


Why you can trust Live Science
Our expert reviewers spend hours testing and comparing products and services so you can choose the best ones for you. Find out more about how we test.
Most amateur astronomers, and even people with only a casual interest in stargazing, have heard of smart telescopes or “smartscopes” — small-aperture robotic telescopes that take images of sky objects with little human intervention. Smartscope users view the astrophotos they capture on smart devices, phones or tablets; there is no eyepiece for visual observing.
Specifications
Aperture: 50 mm
Focal length: 250 mm
Focal ratio: f/5
Sensor: 2.1-megapixel Sony IMX462 CMOS sensor (color)
Resolution: 1920 x 1080 pixels
Battery: Lithium, rechargeable with USB-C charger
Battery capacity: 5Ah
Battery life: 3.5 – 5 hours
Connectivity: Wi-fi (Bluetooth used in initial setup)
Weight: 5.51 lbs / 2.5 kg
ZWO SeeStar S50 review
ZWO SeeStar S50: Design
- A compact and lightweight package is ideal for travel
- Works in either alt-azimuth or equatorial mode
- Everything is controlled via the accompanying app
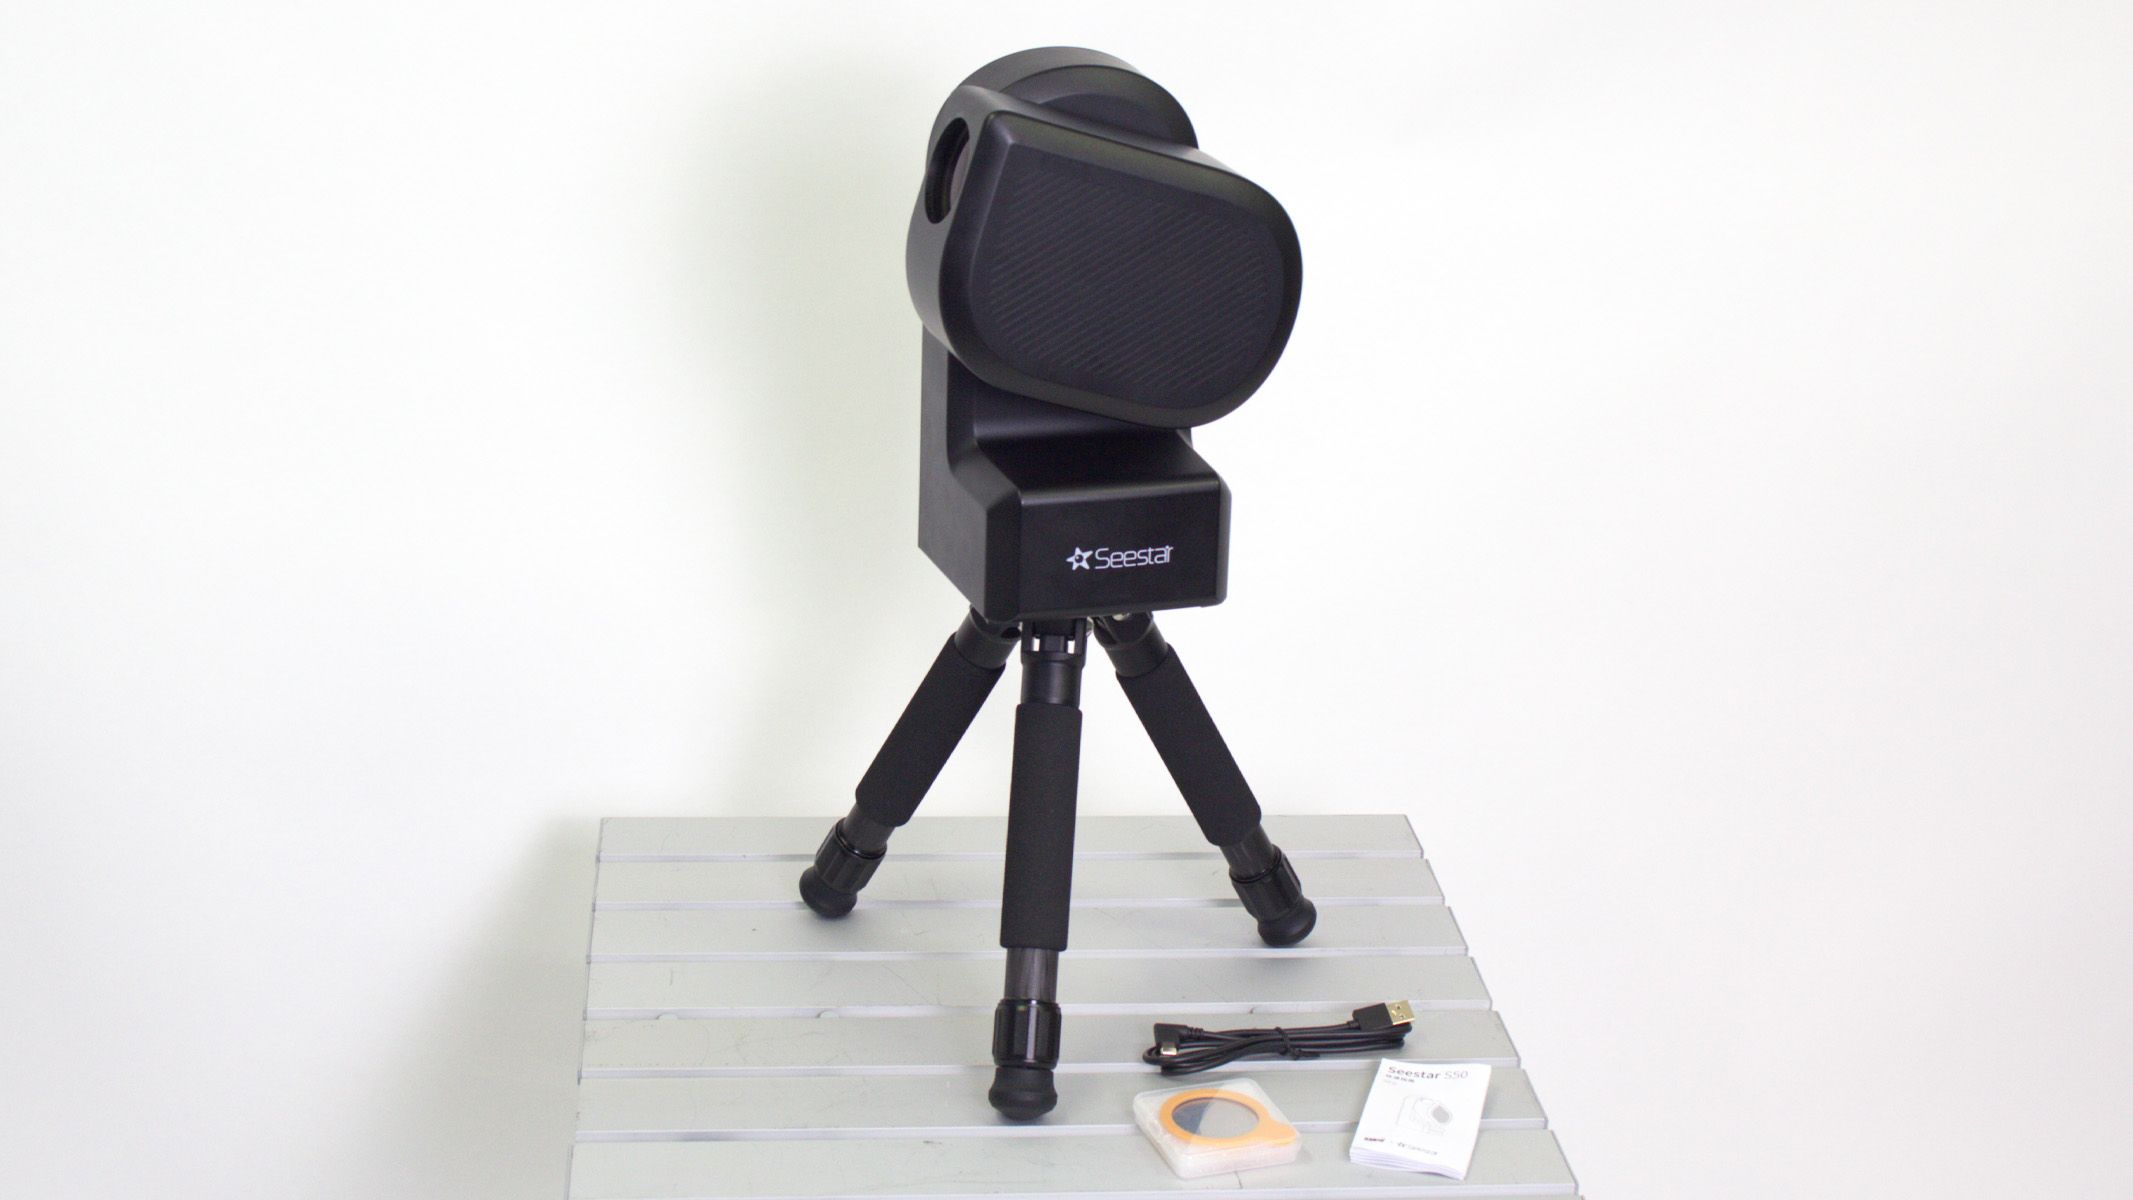
The SeeStar S50 smartscope is an apochromatic (color-free) refractor with an aperture of 50 mm and a focal length of 250 mm. The heart of the S50 is its built-in camera, which features a Sony IMX462 2.1-megapixel, 1920 x 1080 color sensor that is well-matched to the SeeStar’s 0.73 x 1.3-degree field of view. There is 64GB of internal memory for storing astrophotos. Like other smartscopes, the S50 takes multiple short exposures and stacks them into finished astrophotos.
The S50’s features include GoTo and tracking motors that can work in either altazimuth or equatorial mode, and Wi-Fi and Bluetooth support. It has a built-in light pollution reduction (LPR) filter for imaging from light-polluted locations. There’s even an internal dew heater to keep the optics clear on damp nights. All this comes in a compact, lightweight package weighing 5.5 pounds (2.5 kilograms) and measuring 5.6 x 5.1 x 10.1 inches (142.5 x 130 x 257 millimeters).

When a new owner opens the SeeStar box, the first item they’ll encounter is a carrying case. Though it’s made of a Styrofoam-like material, it holds up well. Inside is the black, plastic-bodied S50, which looks more like a coffee maker than a telescope. Also in the case is a carbon fiber tabletop tripod. It only raises the telescope 14 inches (355 mm) off the ground, but is usable. Finally, there’s a USB charging cable, a press-in solar filter and a brief instruction pamphlet.
Unlike conventional computerized telescopes, the S50 has no hand control. Everything is done from a phone or tablet, so the first step in getting it ready to take astrophotos is downloading the free SeeStar app from the Google Play Store or the Apple App Store. There is no PC version, but the app will run on newer Apple computers with M-type processors.
ZWO SeeStar S50: Performance
- App has easy-to-follow instructions
- “Tonight’s Best” offers a simple way to locate objects
- Bright objects like M42 are easy to see with brief exposures
The S50 doesn’t need much in the way of a manual, because the app has step-by-step instructions and tutorials. Turn on the SeeStar by holding down the power button until the scope beeps twice, then release the button. When this talking scope announces, “Power on, ready to connect,” open the app and follow its instructions.
The SeeStar app offers several ways to select targets, including by selecting from a list of Tonight’s Best. An easy way to locate other objects is by using the built-in and comprehensive star atlas, which is accessed by tapping the SkyAtlas icon at the bottom of the home screen. To image the Orion Nebula, M42, for example, select “Object” and enter “M42” in the atlas search field.
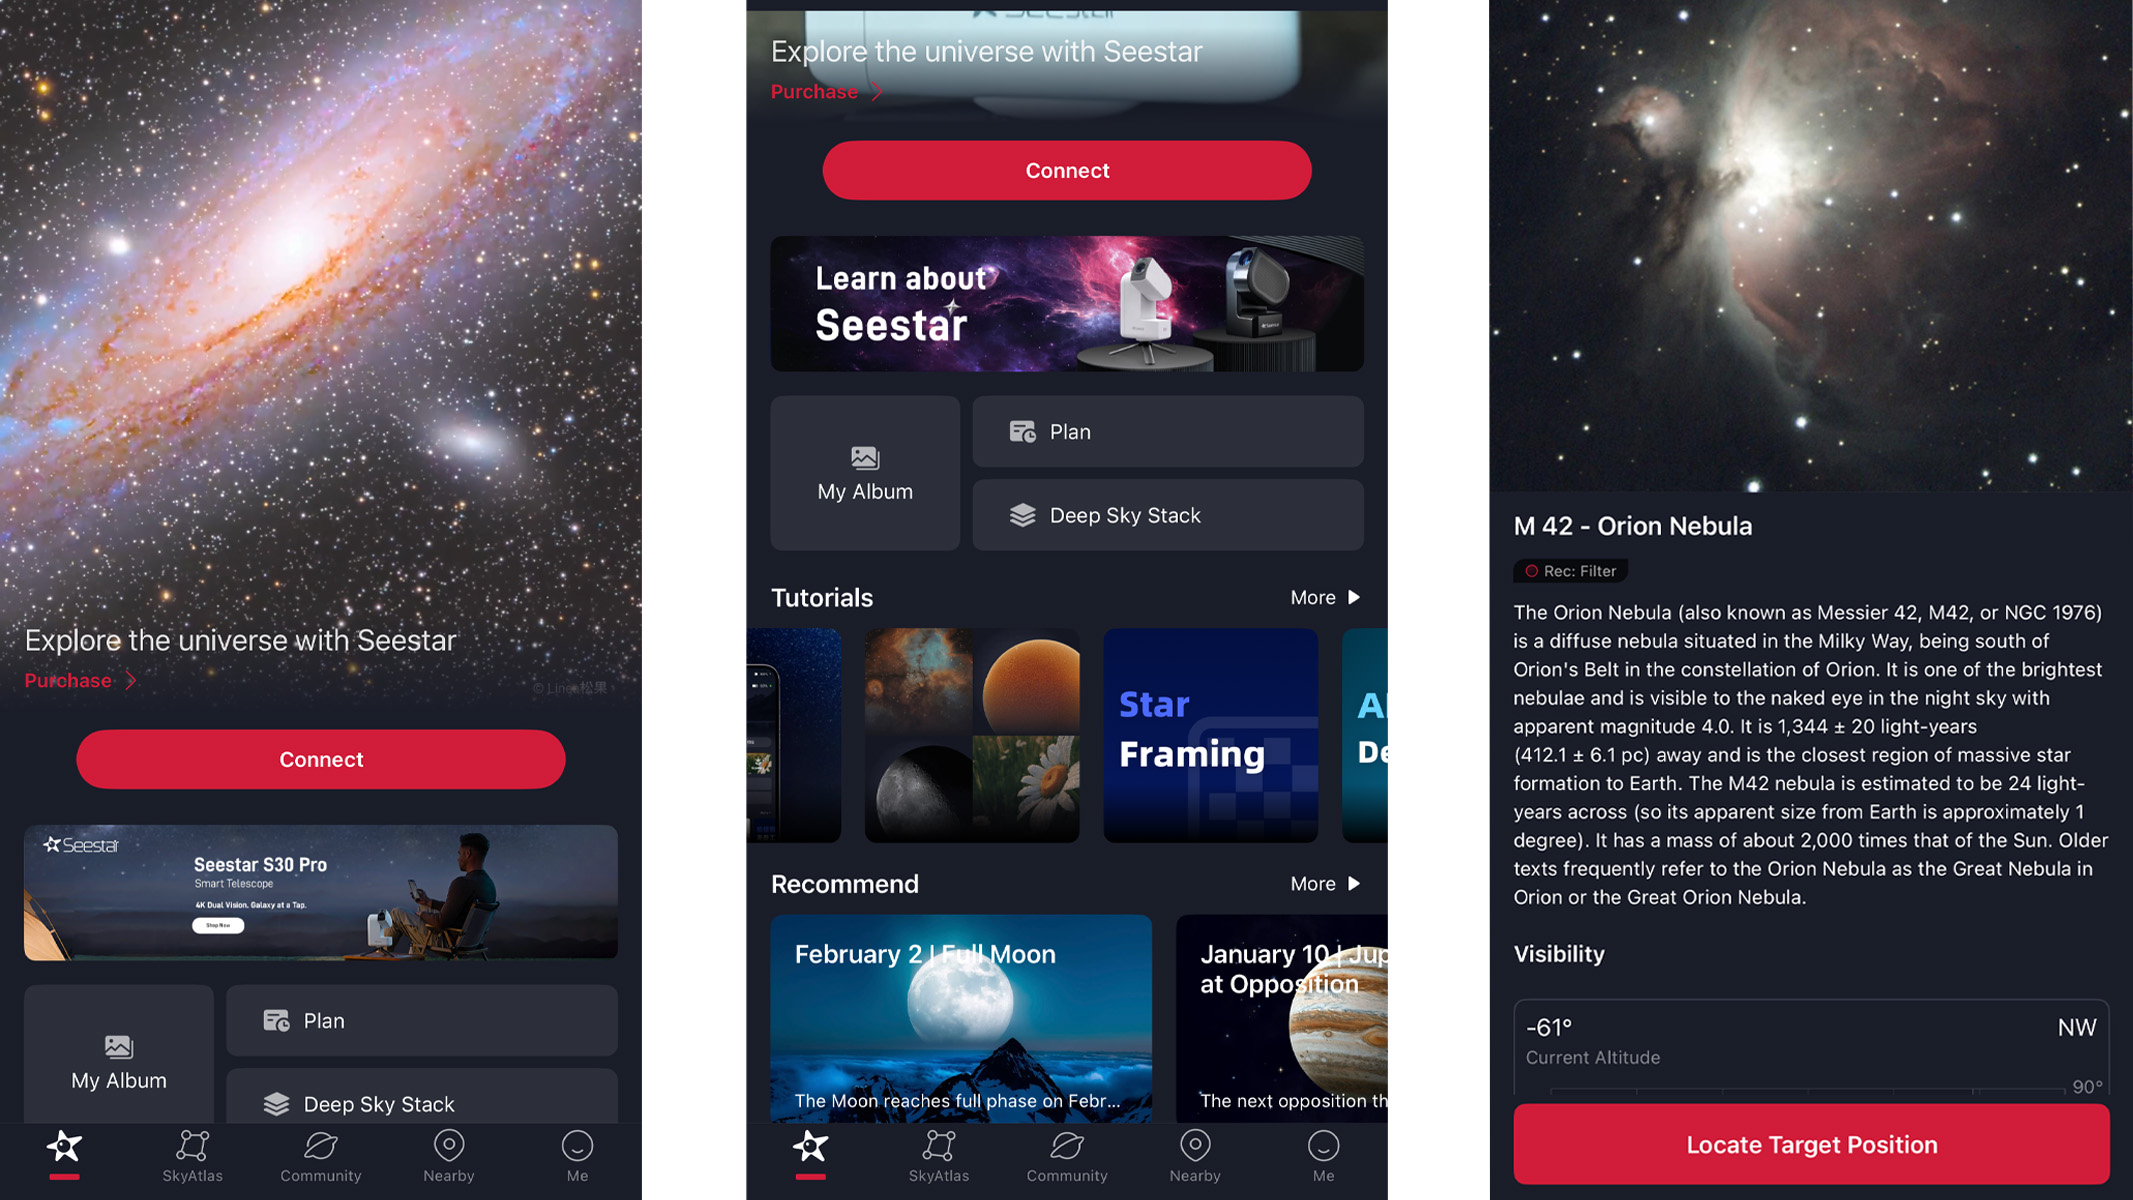
After the nebula is on the atlas screen, pressing “go-to” sends the SeeStar to M42. When the telescope arrives at its destination, it takes images of the star field and compares them to charts in its memory (“plate-solving”) to ensure it’s on the correct spot. It is quite accurate.
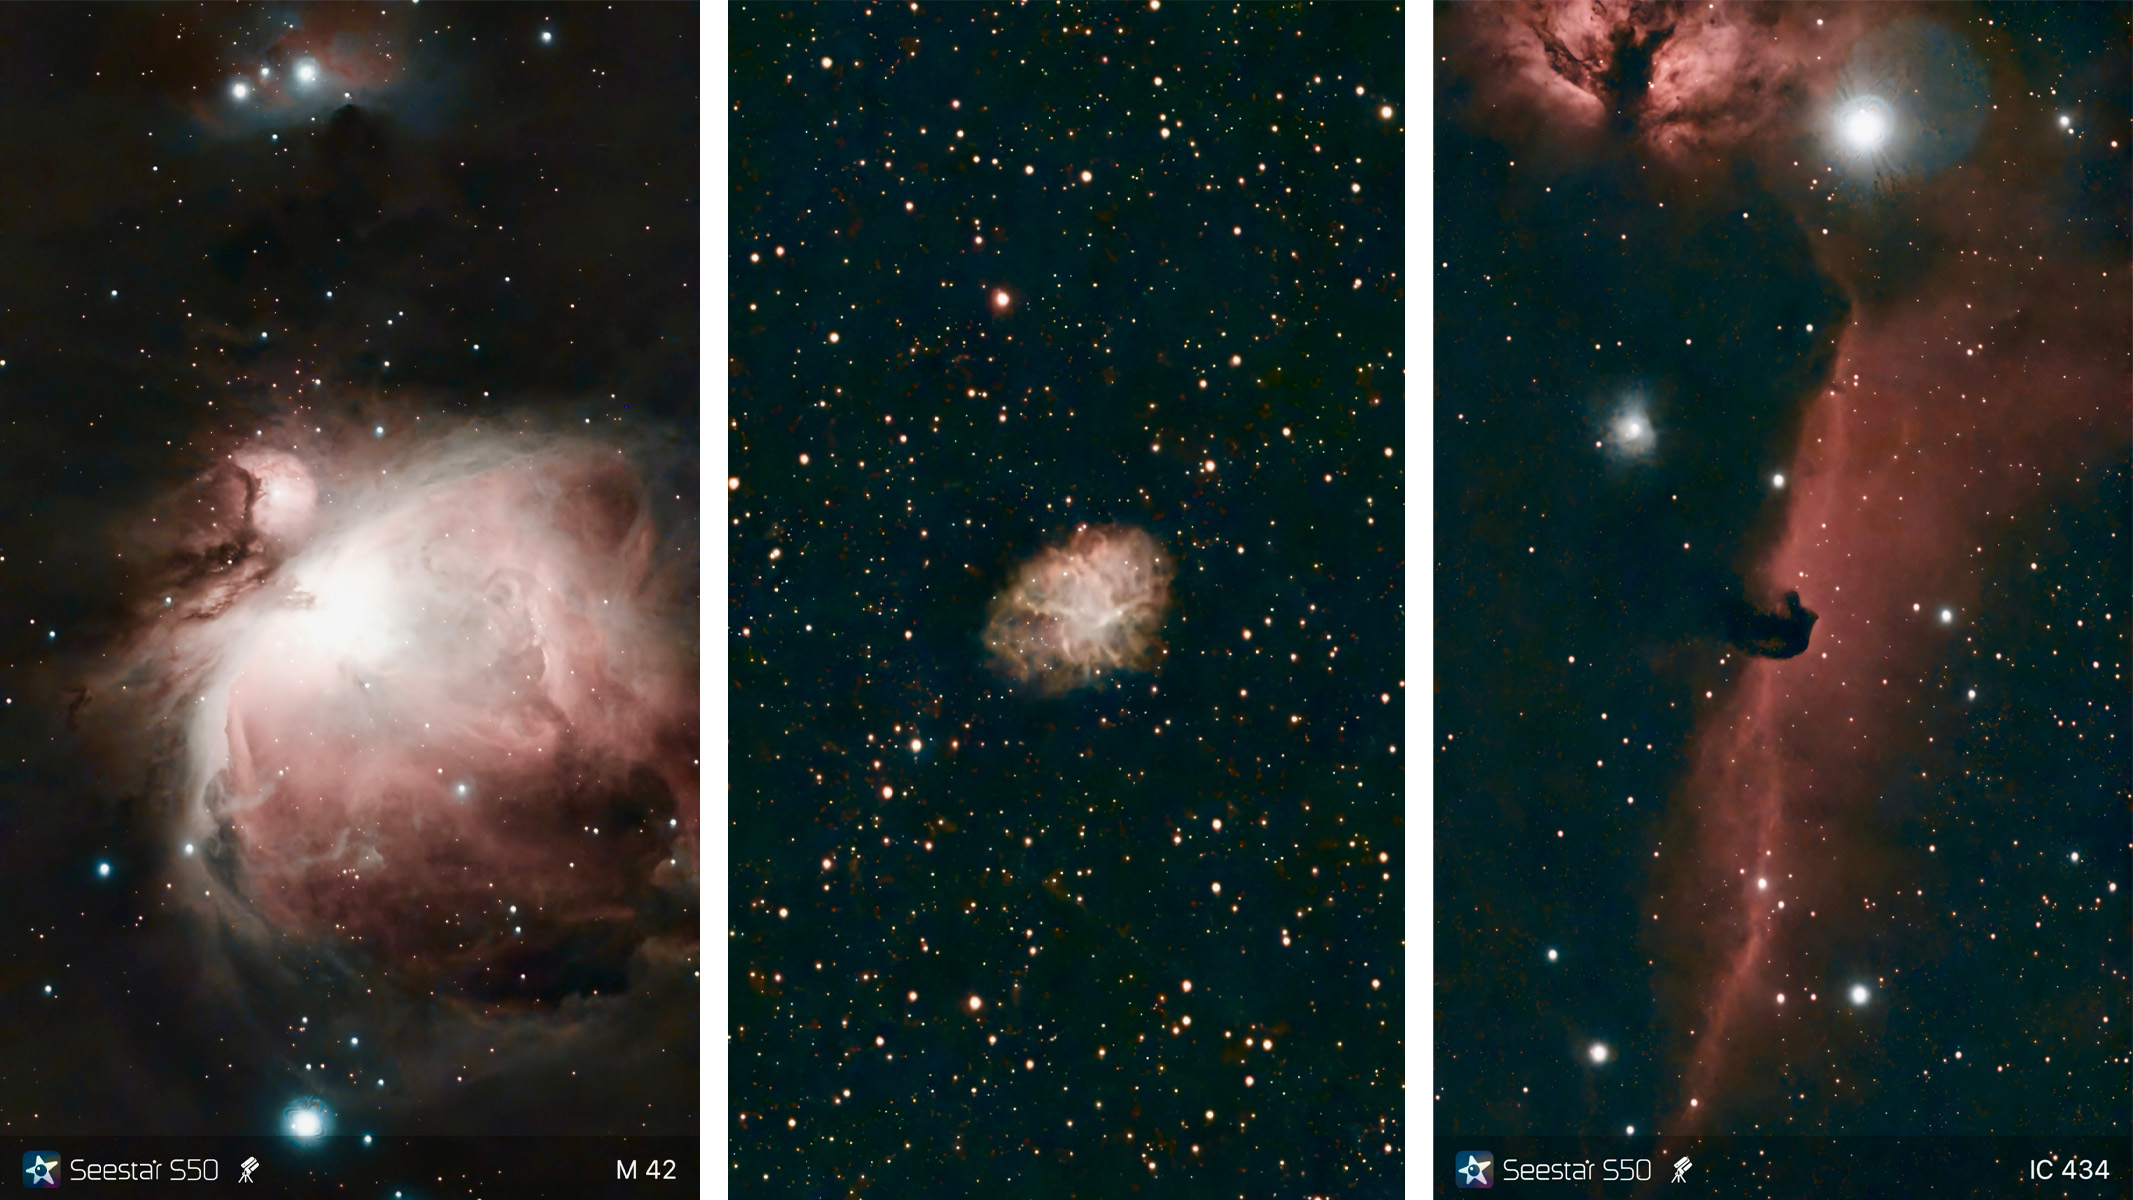
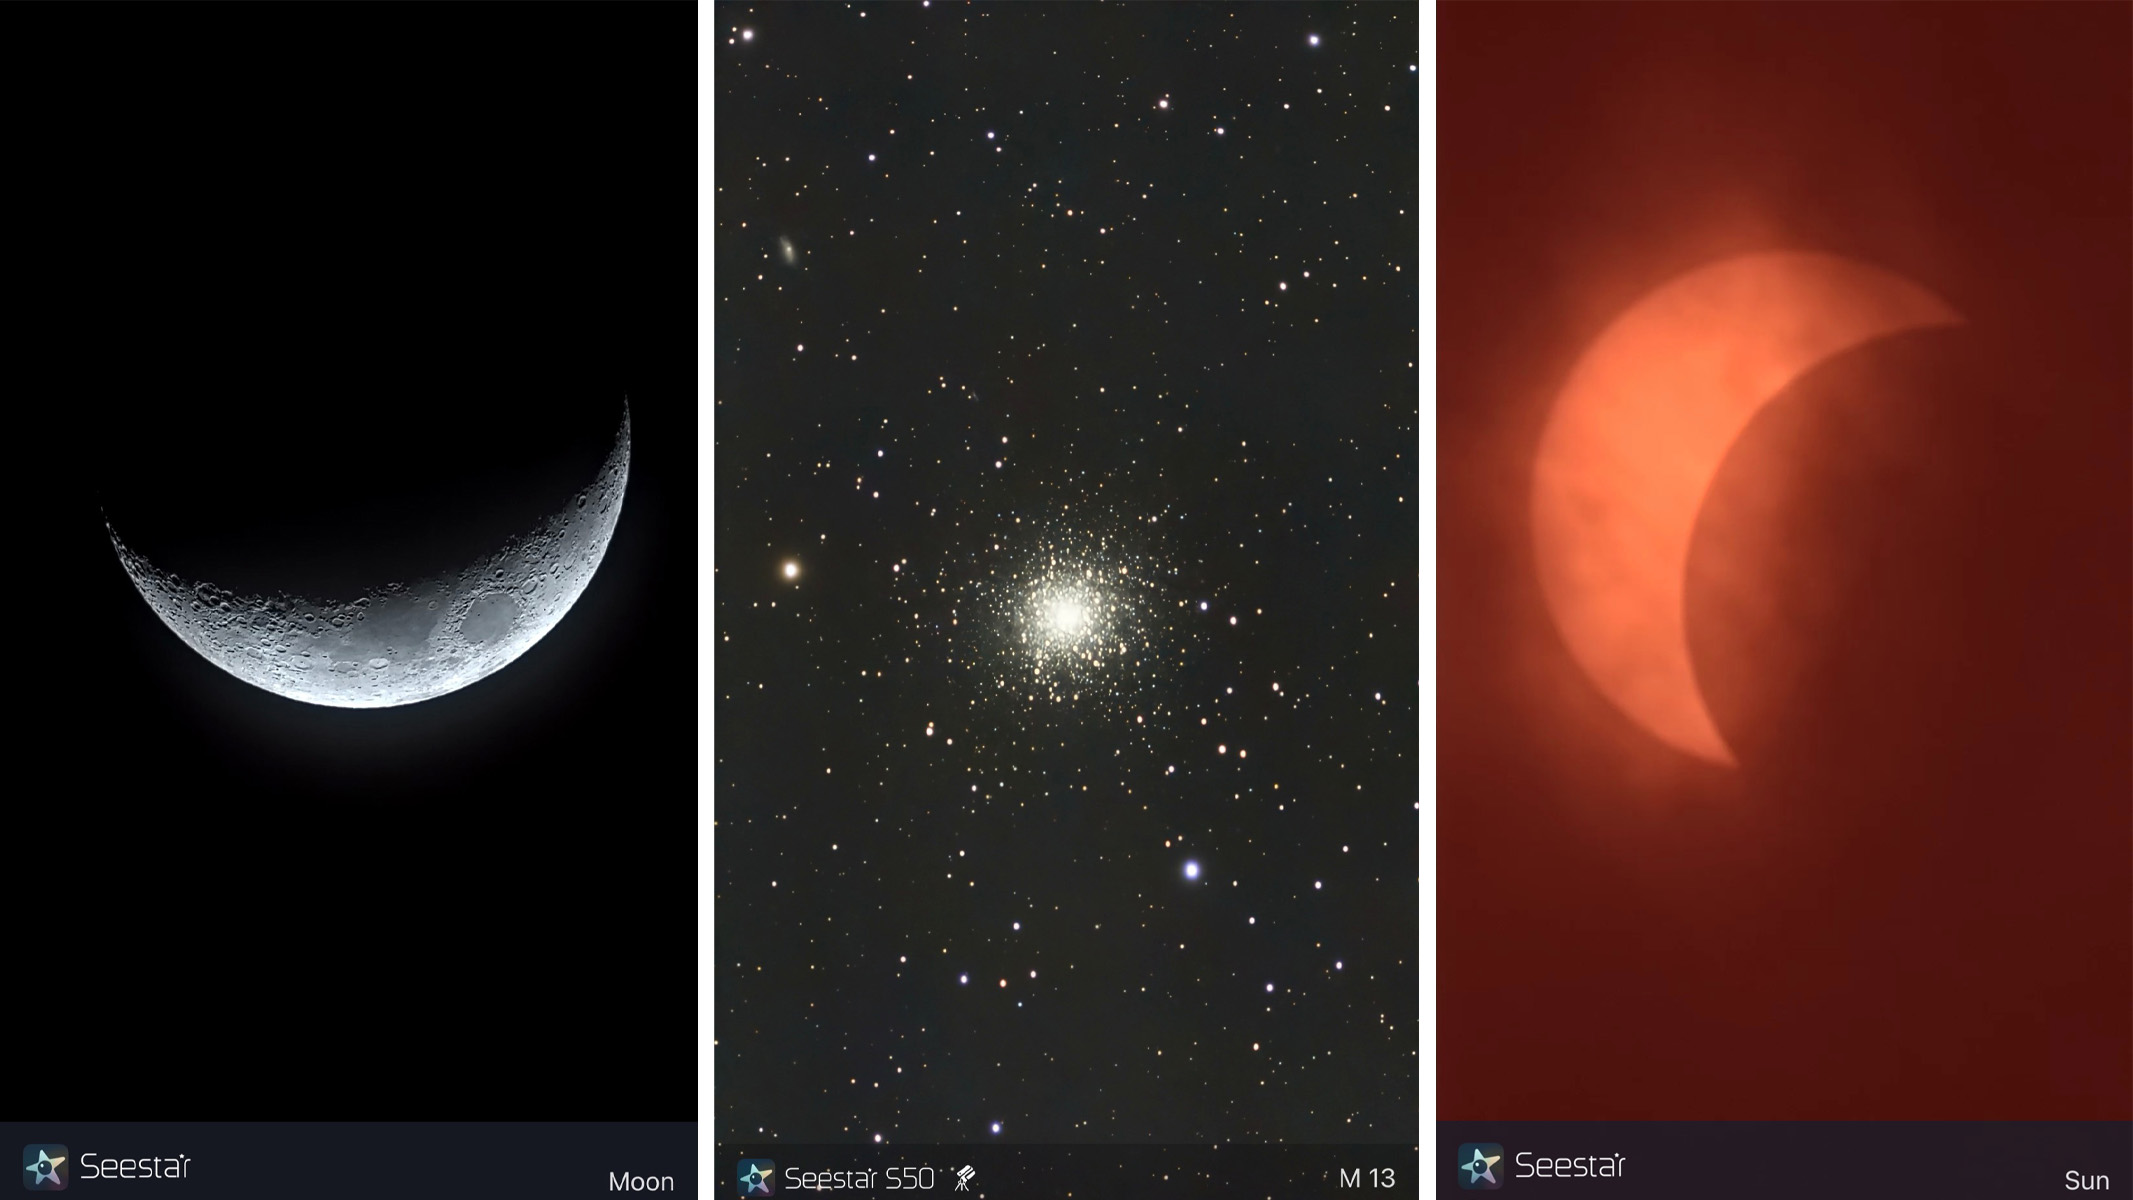
Next, the app shifts to a “live” camera display and autofocuses. A bright object like M42 is easy to see in the brief exposures. After the telescope has focused, tapping the red “shutter” button at the bottom of the screen starts it taking 10-second exposures (the default). The target object will begin to “develop” as exposures are added together.
In less than a minute, the SeeStar can produce a color image of the Orion Nebula that shows far more detail than can be seen visually in large telescopes.
ZWO SeeStar S50: Functionality

- Connection via Bluetooth and WiFi
- App can feel overwhelming at first, but you soon learn the ropes
- Can be connected to your home network
The first time the S50 is used, it must be paired to your smart device with Bluetooth. Once Bluetooth is active, the scope will connect directly to the phone or tablet with Wi-Fi. The next time the SeeStar is used, Bluetooth will not be required.
At first, the SeeStar app seems overwhelming, with many selections and options in unintuitive places. However, with a little experience, the process of taking astrophotos becomes easier. It would help if ZWO didn’t keep changing the app to the point where it frequently needs to be relearned. However, the telescope’s outstanding pictures are worth a little practice. The SeeStar itself is remarkably problem-free for such a relatively inexpensive instrument.
This direct Wi-Fi connection works well and is handy for use at dark sites. At home, however, it’s best to use “Station Mode.” That allows the telescope to connect to a home network instead of directly to a phone or tablet. In Station Mode, your smart device can be used as normal and doesn’t need to remain close to the scope.
Should you buy the ZWO SeeStar S50?
Is ZWO’s SeeStar S50 perfect? Of course not, no telescope is; there are a few problems. The major one is that ZWO updates the SeeStar app so frequently. While adding new features is great, bugs — sometimes serious ones — are often introduced as well.
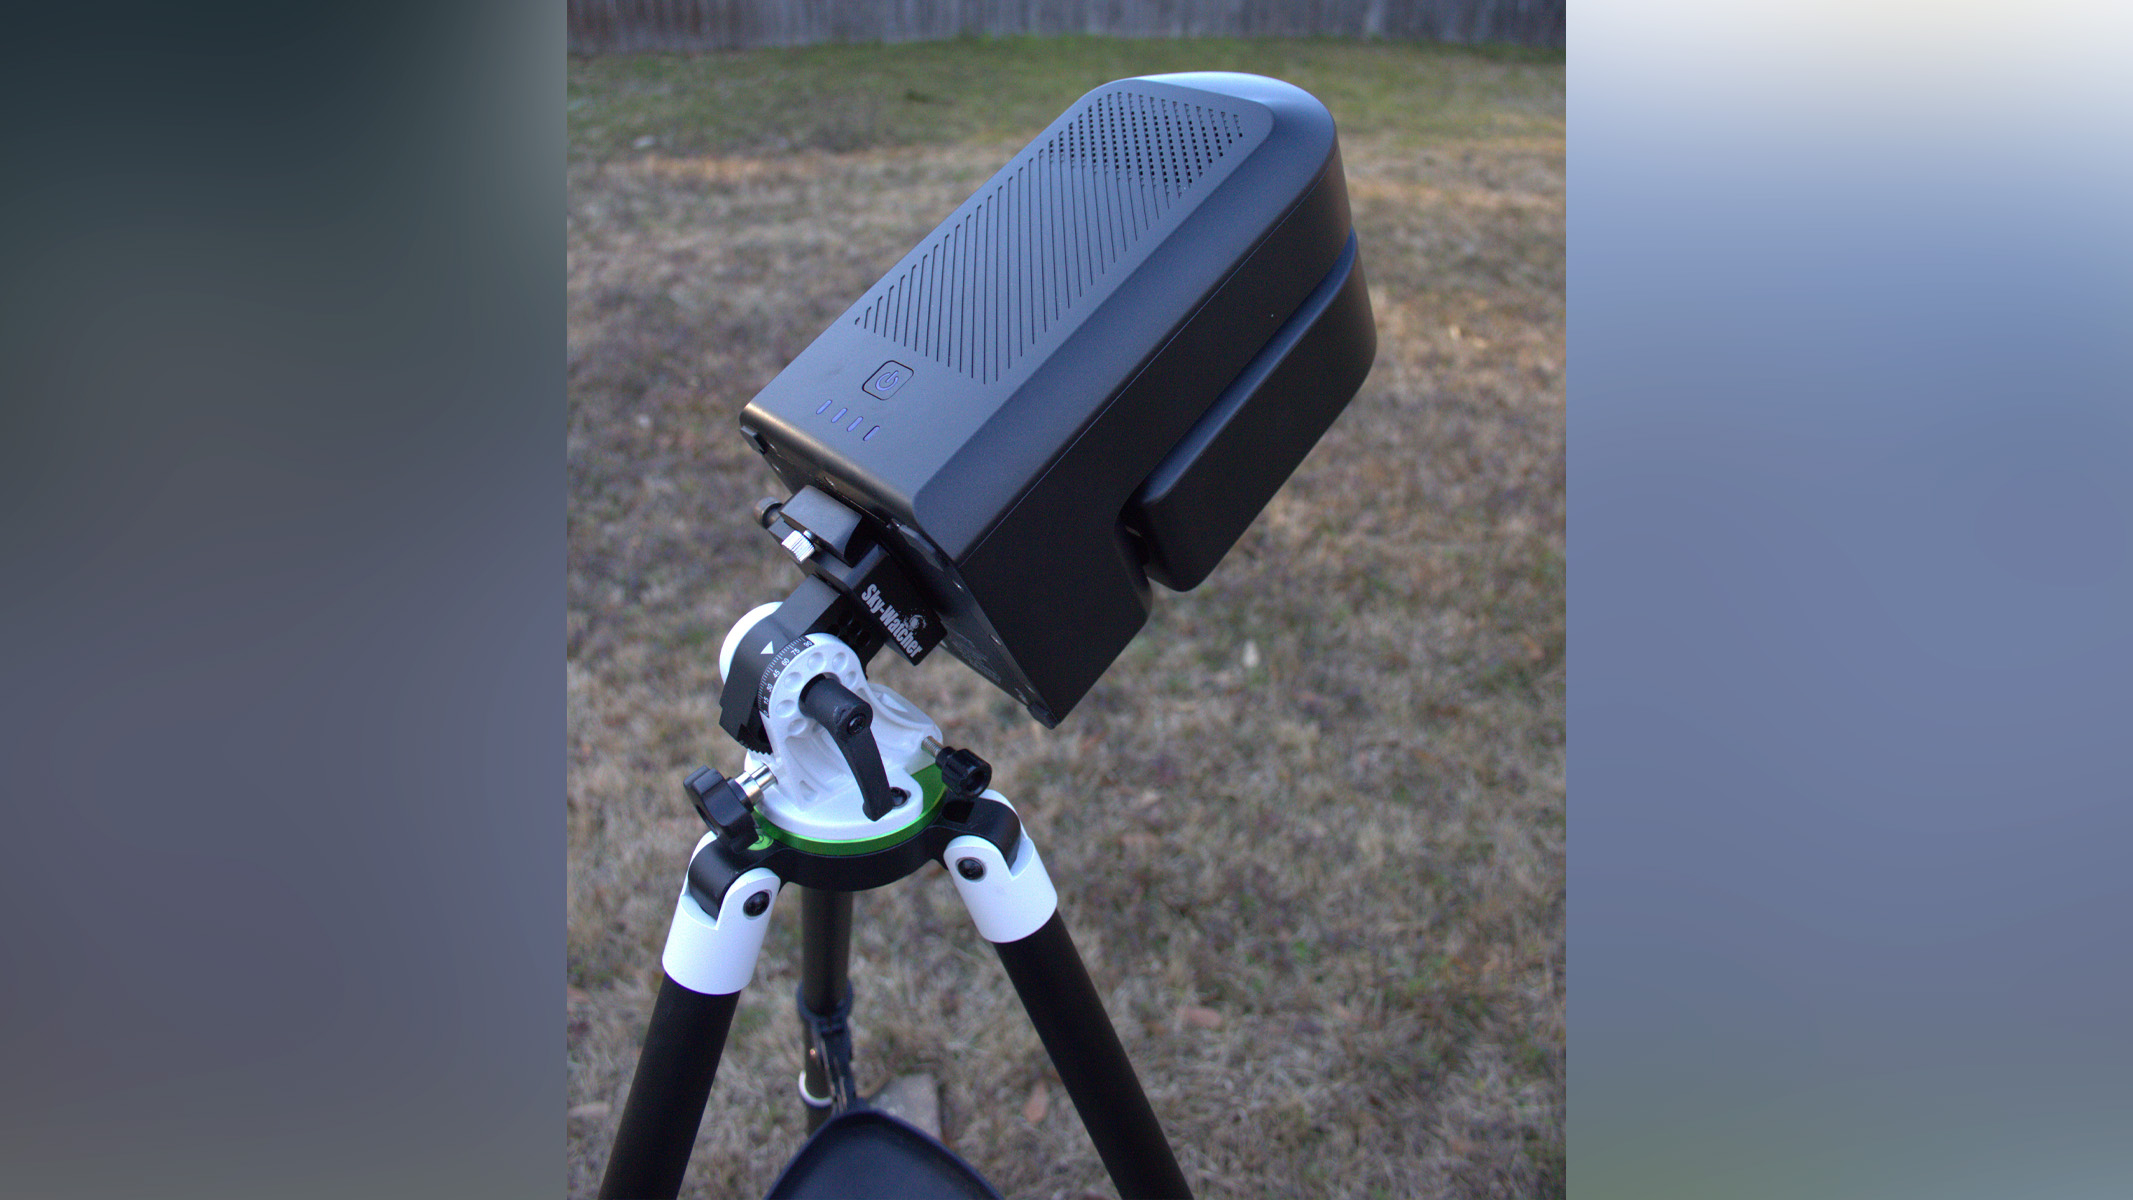
The SeeStar produces impressive out-of-the-box results in altazimuth mode, but 10-second exposures (the scope can expose for as long as 60 seconds) are practically mandatory. Going to 20 seconds, which produces less noisy pictures, results in dropped frames and trailed stars. There is a solution, however: equatorial or “EQ” mode.
In EQ mode, the SeeStar is tilted over so its body points roughly at the north (or south) celestial pole. The app includes a built-in routine that allows the S50 to be precisely polar-aligned. Using EQ mode requires the purchase of additional gear, however: either a full-sized camera tripod with a tiltable head, or one of the equatorial wedges sold for the SeeStar. Under most conditions, EQ mode produces markedly superior pictures.
Who is the SeeStar specifically not for? Those who are most interested in the moon and planets. While it can produce nice whole-disk images of the sun (with the included solar filter) and the moon, planets will look very small with only 250 mm of telescope focal length.
If this product isn’t for you
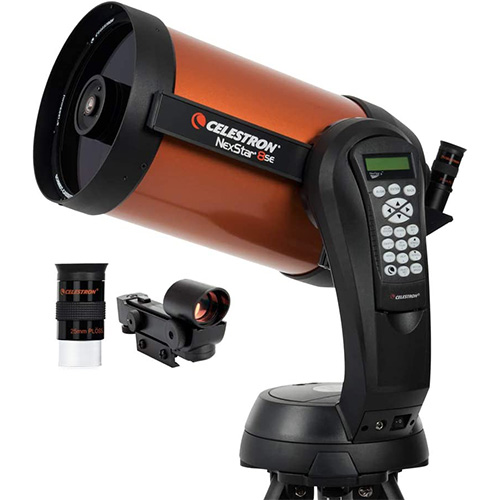

If you’d rather see the cosmos with your own eyes than on your screen, you can’t go wrong with the well-loved Celestron NexStar 8SE — known as the world’s most beloved telescope.
Read our full Celestron NexStar 8SE review
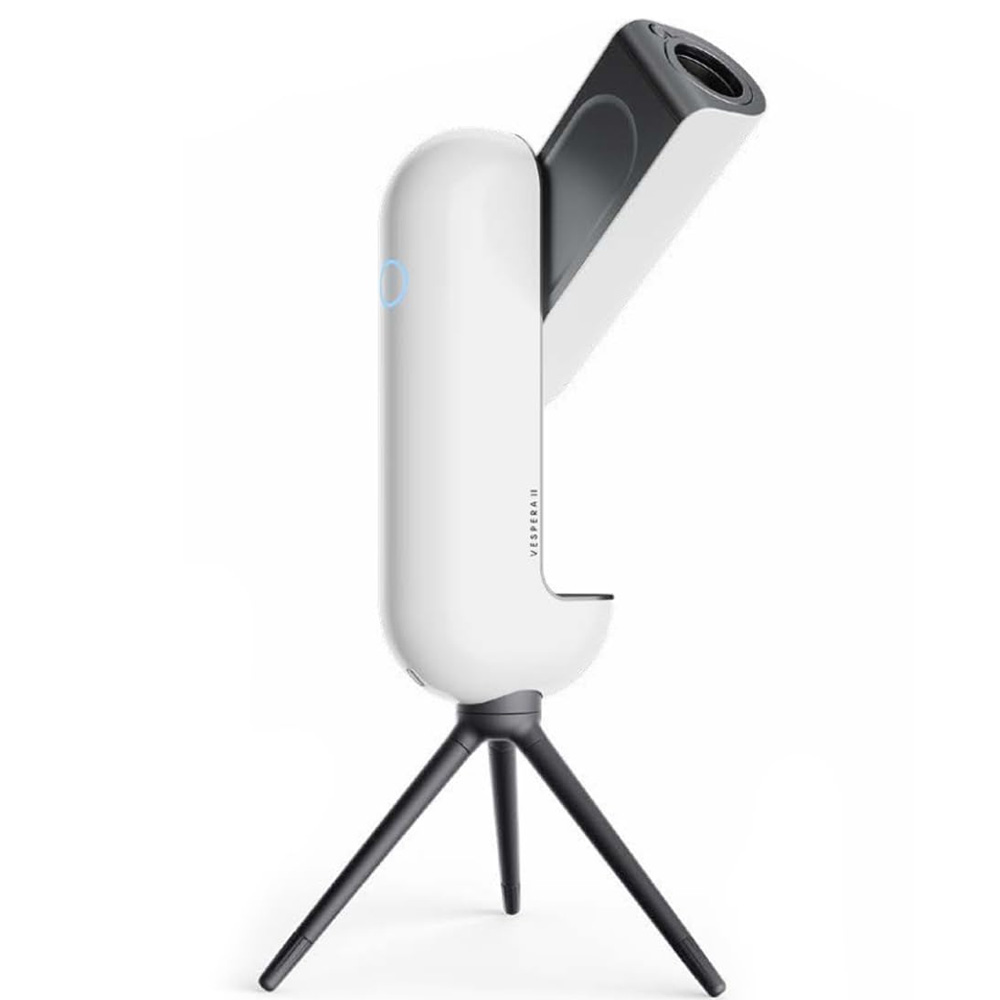

If you’d rather invest more into one of the best value for money telescopes you can buy, we’d recommend the Vaonis Vespera II. The images are stunning and it’s a very reasonable price compared to some of its competitors.
Read our full Vaonis Vespera II review
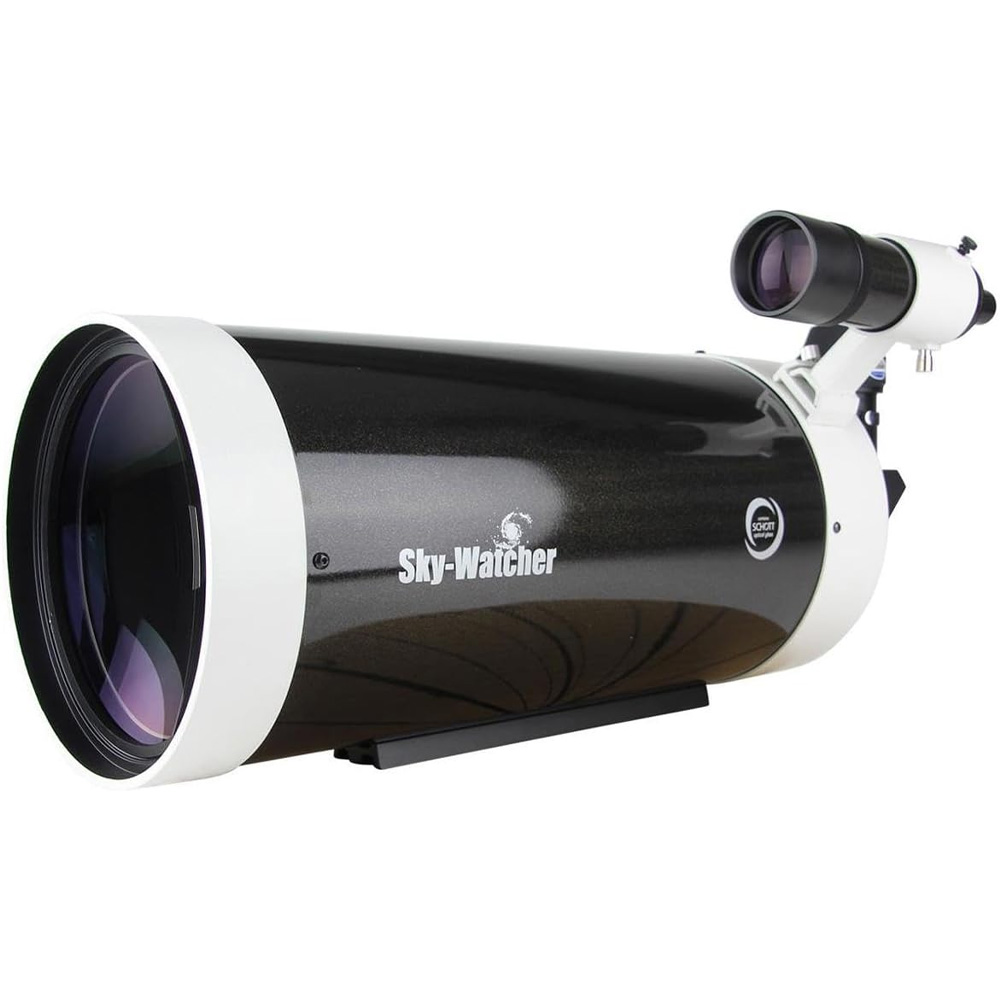
Sky-Watcher SkyMax 180 Pro
Smart telescopes are typically designed for deep-sky objects, so you’ll want an observational telescope with a good aperture to resolve detail in the planets — something like the Sky-Watcher SkyMax 180 Pro.


